

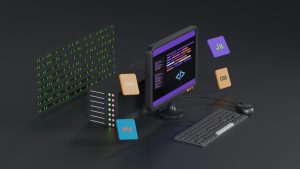
Creating a QR check-in experience for an Android app no longer requires writing native Kotlin or Java. You can design the entire flow inside Lovable as a progressive web app and then use WebViewGold to turn that PWA into a native Android app with access to the device camera and QR scanner.
The Core Idea
Lovable gives you a fast way to build a responsive check-in interface with forms, buttons, and data storage. WebViewGold then wraps that web app into a native Android shell and exposes a JavaScript bridge for native scanner access. The result is a smooth check-in flow where a user taps a button, the native QR scanner opens, and the scanned code returns directly to your Lovable interface.
Why This Works for No-Code Builders
This setup removes the traditional barrier between web apps and device hardware. You keep the visual design, logic, and database connections inside Lovable. The native scanner runs through WebViewGold’s Android layer, so the camera permission and QR decoding happen outside the browser sandbox. Your PWA stays lightweight while the final app feels like a purpose-built Android tool.
What You Need Before Starting
A Lovable project with a check-in screen is the first piece. You also need a WebViewGold project configured for Android and a real device for testing the camera flow. The scanner bridge works best when your Lovable app is served over HTTPS, which Lovable handles automatically.
Setting Up the Lovable PWA
Inside Lovable, create a simple screen with a button labeled Scan QR Code and a hidden text field that will hold the scanned value. Add a status area for success or error messages. Connect the check-in action to your preferred backend, such as Supabase or a Google Sheet, so each scanned code gets logged with a timestamp.
Adding the Native Scanner Bridge
WebViewGold exposes a JavaScript interface that your Lovable PWA can call when running inside the Android app. In your Lovable custom code section, add a function that checks for the WebViewGold bridge and triggers the native scanner. A fallback can show a manual entry field when the app runs in a regular browser.
function startNativeScan() {
  if (window.WebViewGold && window.WebViewGold.scanQRCode) {
    window.WebViewGold.scanQRCode();
  } else {
    document.getElementById('manualEntry').style.display = 'block';
  }
}

function onQrCodeScanned(result) {
  document.getElementById('scannedCode').value = result;
  checkIn(result);
}
Handling the Scan Result in Lovable
The native scanner returns the decoded value to a callback function like onQrCodeScanned. Your Lovable app can then validate the code, display a confirmation message, and send the data to your backend. Keeping this logic in the PWA means you can update the check-in rules without rebuilding the Android app.
Wrapping the PWA with WebViewGold
WebViewGold is a quick and simple solution to convert websites into apps for Android easily. You provide your Lovable app URL, configure the scanner permission and JavaScript bridge settings, and build the APK. The native QR scanner becomes available to your PWA without writing any Android code.
Testing the Full Flow
First open your Lovable app in a desktop browser and confirm the manual entry fallback works. Then install the WebViewGold APK on an Android device and tap the Scan QR Code button. The native camera view should open, read the QR code, and pass the value back to your Lovable interface. Check your backend to verify that the check-in was logged correctly.
Final Thoughts
Combining Lovable with WebViewGold gives you a no-code route to a native QR check-in app on Android. The PWA handles the user experience and data flow while WebViewGold unlocks the device scanner through a simple bridge. This approach saves development time and keeps the entire project manageable for non-technical builders.
You May Also Like
When Lovable Goes Offline: A ...
November 13, 2026
The Android Offline Chameleo ...
November 12, 2026
Airplane Mode Android: Swapp ...
November 11, 2026